Setup
After compiling waywall, you will need to configure your instance(s) to use it. It is highly recommended that you use Prism Launcher. If you already have it, MultiMC can work, but it lacks some features.
Caution
If your Minecraft launcher of choice is installed in some sort of container (e.g. Flatpak), then waywall will not work.
Consider installing Prism Launcher from your distribution’s package manager (if available) or from the Downloads page.
GLFW
Minecraft uses a library known as GLFW in order to create a window and receive keyboard and mouse input. Unfortunately, the version shipped by default does not work with waywall, so you will need to compile a patched version of GLFW.
Tip
If you used a prebuilt package or built your own with the package building script, then you already have the correct version of GLFW available! It can be found at
/usr/local/lib64/waywall-glfw/libglfw.so.
Tip
If you are using Prism Launcher installed from Nixpkgs, you can skip and continue to the next step as it already includes the patch.
If you have Nix but are using Prism Launcher from a different source, you can install the
glfw3-minecraftpackage withnix profileand use the path/home/USER/.nix-profile/lib/libglfw.soin the upcoming steps.
Note
Version 26.1 does not require this patch, instead requiring you to add the following Java arguments:
-DMC_DEBUG_ENABLED -DMC_DEBUG_PREFER_WAYLAND.
You can compile the patched version of GLFW with the following commands:
# clone GLFW
git clone https://github.com/glfw/glfw
cd glfw
git checkout 3.4

# apply the patches
curl -o glfw.patch https://raw.githubusercontent.com/tesselslate/waywall/be3e018bb5f7c25610da73cc320233a26dfce948/contrib/glfw.patch
git apply glfw.patch

# compile GLFW
cmake -S . -B build -DBUILD_SHARED_LIBS=ON -DGLFW_BUILD_WAYLAND=ON
cd build
make
After running these commands, the new patched version of GLFW will be located at
glfw/build/src/libglfw.so (or src/libglfw.so from the build directory.)
You can copy it to a safer location like ~/.local/lib64.
Important
If you move the GLFW library to another location, make sure to copy the symlinks (
libglfw.so.3andlibglfw.so.3.4) as well.
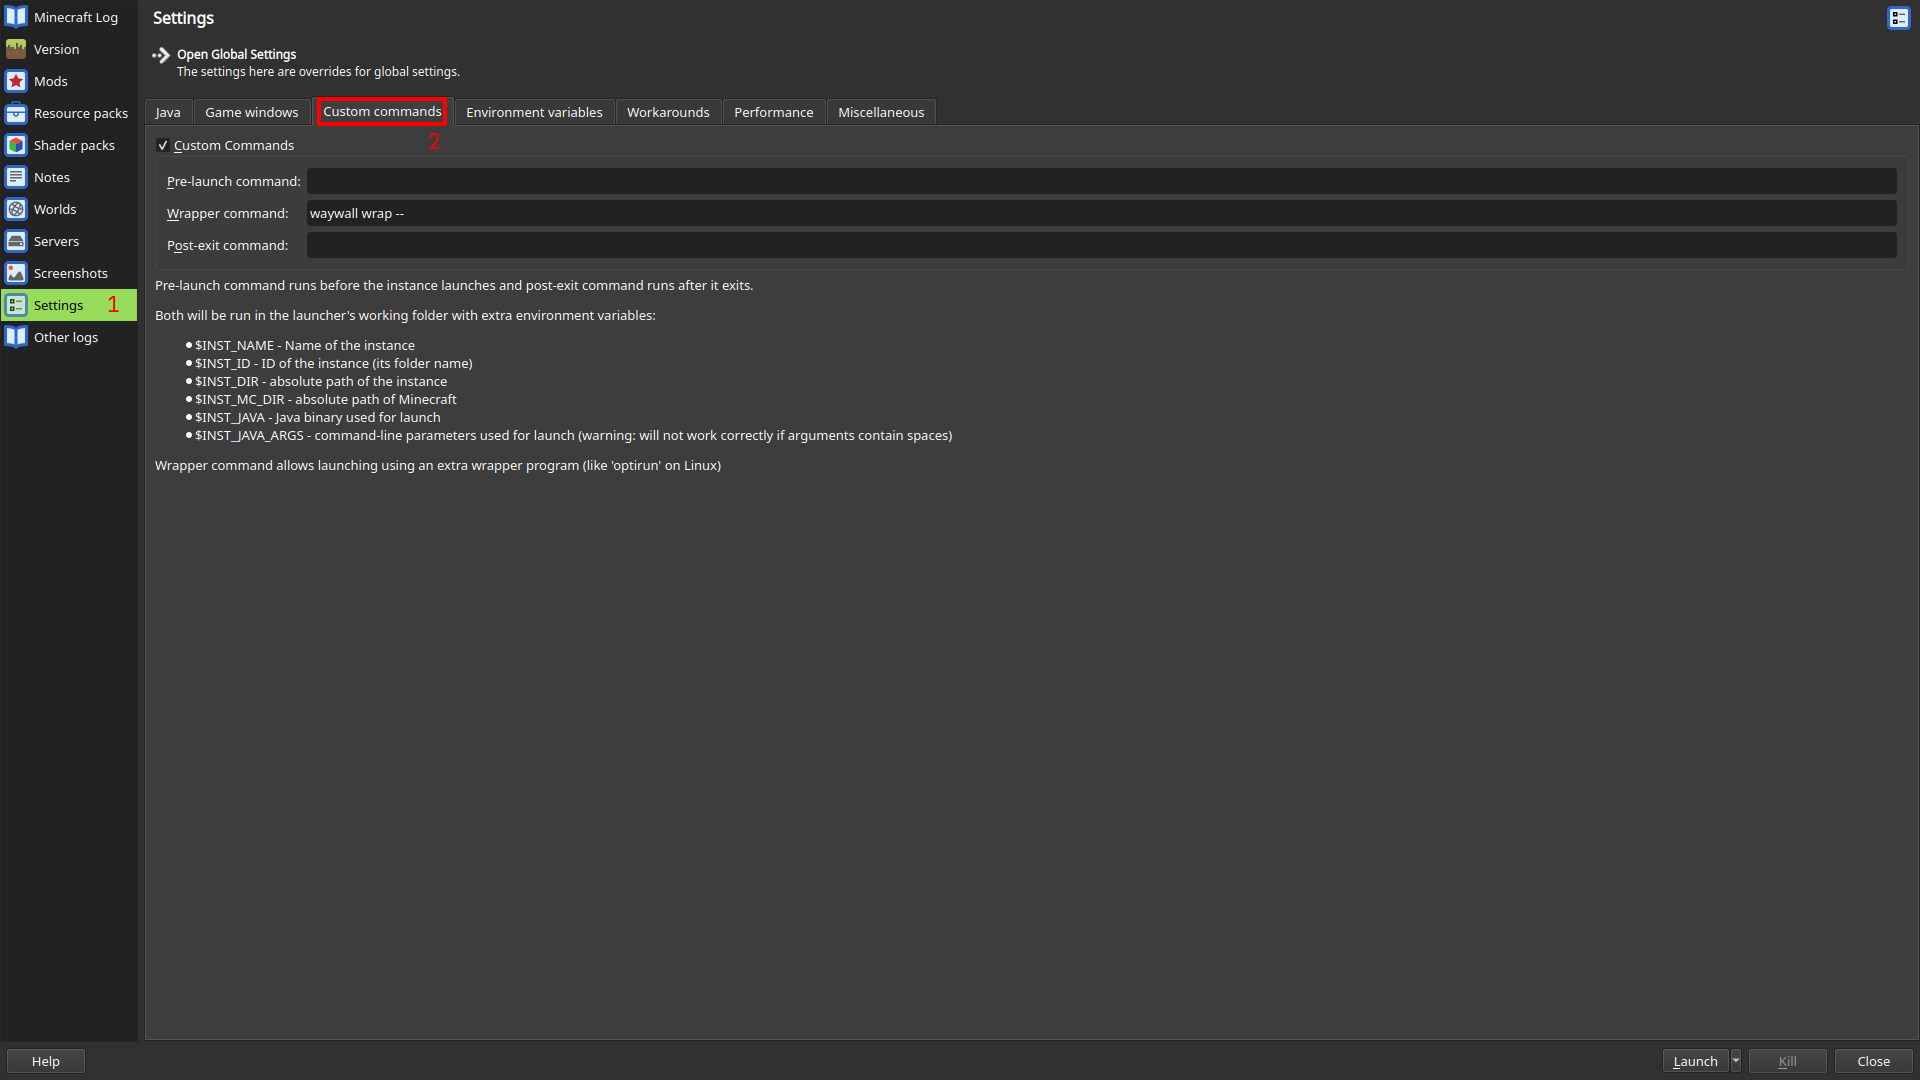
Instance setup
First, you need to configure your instance to use waywall. Navigate to the
Custom commands submenu and enter waywall wrap -- into the Wrapper command
textbox. If needed, change waywall to point to the waywall executable you
compiled earlier.
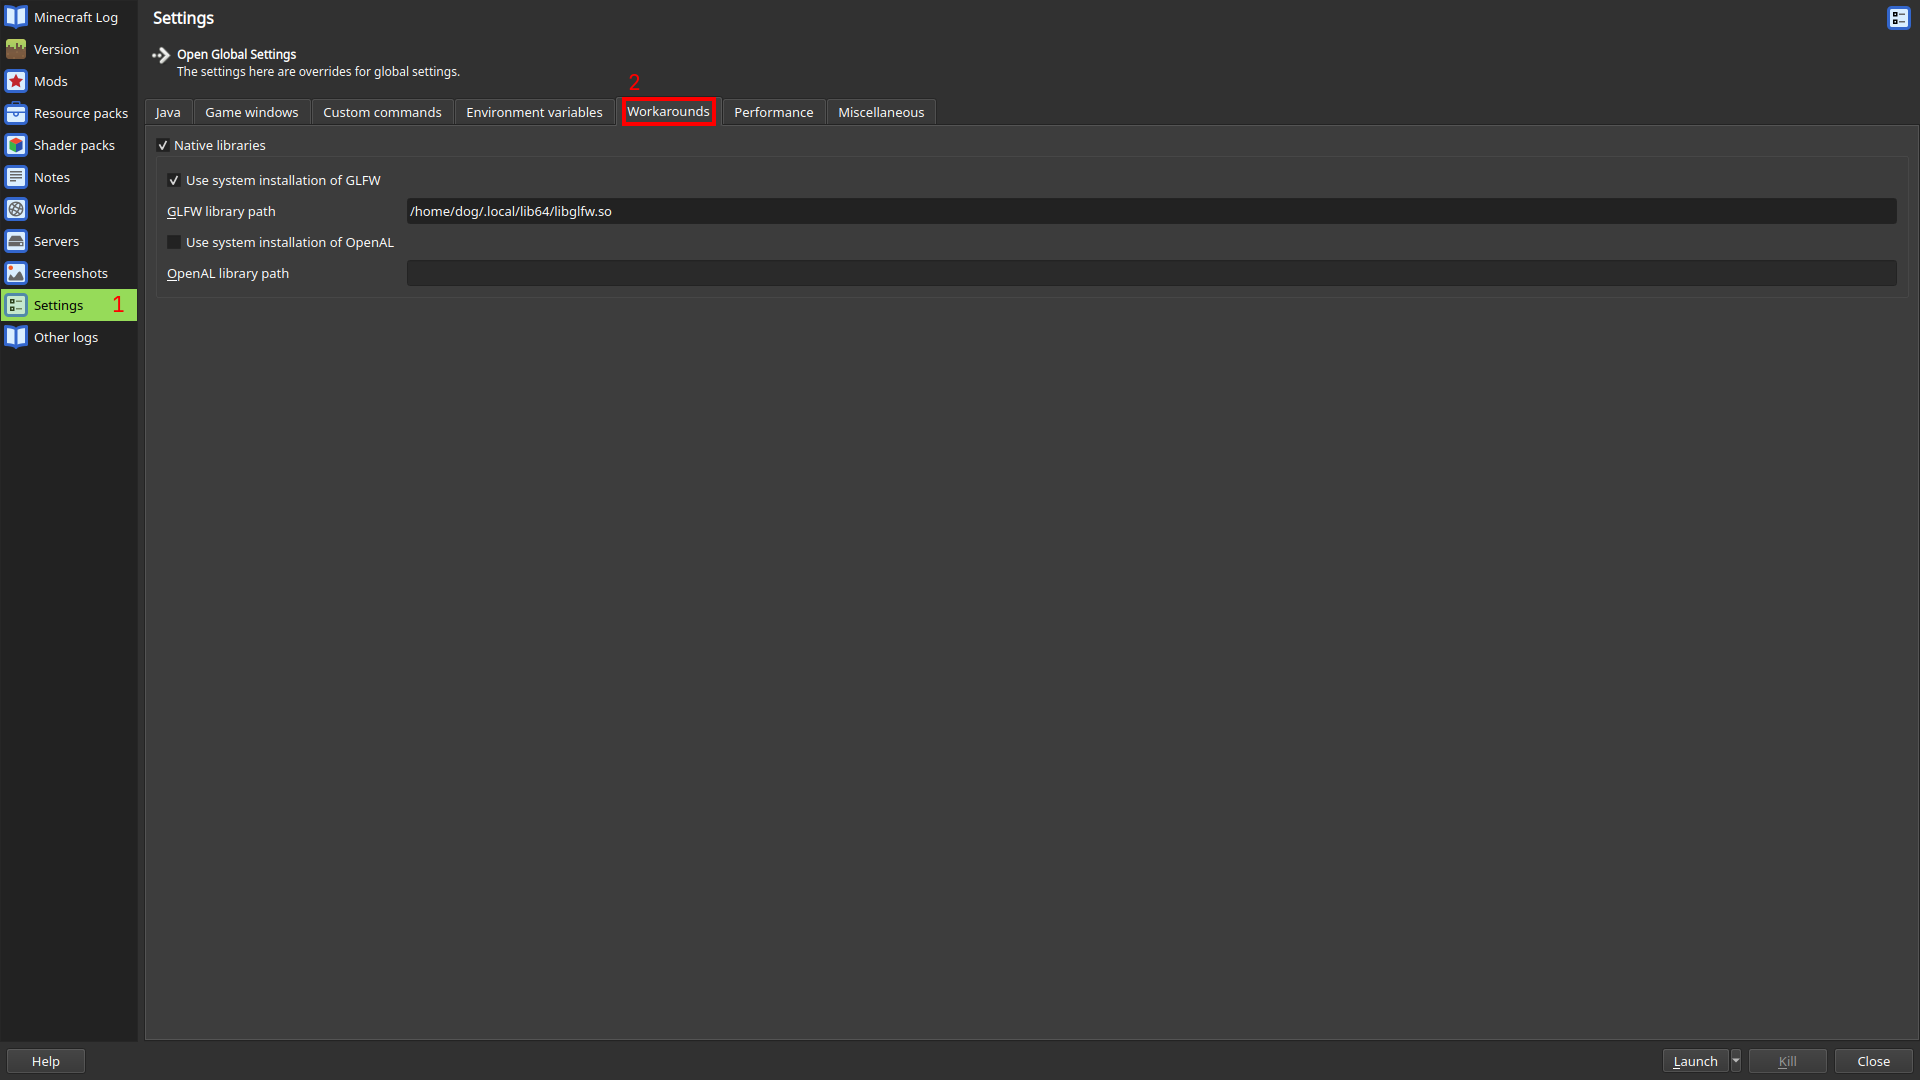
Secondly, you will need to use the patched version of GLFW. This differs based on whether you are on PrismLauncher or MultiMC.
Prism Launcher
You can configure your instance to use the patched version of GLFW by opening
its settings (with the Edit button on the right pane) and going to Settings
-> Workarounds. Then, enable Native libraries and Use system installation of GLFW. Finally, enter the path to the patched libglfw.so you just compiled
or installed.
Important
Prism Launcher will not expand
~. If your patched GLFW is within your home directory, you need to type out the absolute path.
Tip
If you are using Prism Launcher installed from Nixpkgs, you must leave the path field empty to automatically use the patched GLFW.
MultiMC
You can configure your instance to use the patched version of GLFW by opening
its settings (with the Edit button on the right pane) and going to Settings.
Then, go to the Workarounds tab and confirm that Use system installation of GLFW is disabled. Finally, return to the Java tab and add
-Dorg.lwjgl.glfw.libname=PATH to your Java arguments, replacing PATH with
the path to the patched libglfw.so you just compiled.
Important
MultiMC will not expand
~. If your patched GLFW is within your home directory, you need to type out the absolute path.
Configuration
waywall follows the XDG Base Directory specification and will search for a
configuration file in $XDG_CONFIG_HOME/waywall (usually ~/.config/waywall).
If no configuration file exists, one will be automatically generated for you.
You can use the following configuration as a starting point:
local waywall = require("waywall")
local helpers = require("waywall.helpers")

local config = {
    input = {
        layout = "us",
        repeat_rate = 40,
        repeat_delay = 300,

        sensitivity = 1.0,
        confine_pointer = false,
    },
    theme = {
        background = "#303030ff",
    },
}

config.actions = {}

return config
NVIDIA
If you use an NVIDIA GPU, you will also need to set the environment variable
__GL_THREADED_OPTIMIZATIONS to 0. This can be done in the Environment variables submenu.
This environment variable fixes a startup crash (GLFW error 65544) and also
ensures that preemptive navigation works correctly.
Dual-GPU systems
If you have a system with an Nvidia GPU and an integrated GPU (quite common
in laptops), go to the Performance tab and check Use discrete GPU.
